การเขียนโค้ดให้หลอดไฟ LED บนบอร์ด NodeMCU ESP8266

ขั้นตอน
1. คลิกที่เมนู File > Example > ESP8266 > คลิกเลือก Blink

2. ตัวอย่างโค้ด
———————————————————————————————————
/*
ESP8266 Blink by Simon Peter
Blink the blue LED on the ESP-01 module
This example code is in the public domain
The blue LED on the ESP-01 module is connected to GPIO1
(which is also the TXD pin; so we cannot use Serial.print() at the same time)
Note that this sketch uses LED_BUILTIN to find the pin with the internal LED
*/
void setup() {
pinMode(LED_BUILTIN, OUTPUT); // Initialize the LED_BUILTIN pin as an output
}
// the loop function runs over and over again forever
void loop() {
digitalWrite(LED_BUILTIN, LOW); // Turn the LED on (Note that LOW is the voltage level
// but actually the LED is on; this is because
// it is active low on the ESP-01)
delay(1000); // Wait for a second
digitalWrite(LED_BUILTIN, HIGH); // Turn the LED off by making the voltage HIGH
delay(2000); // Wait for two seconds (to demonstrate the active low LED)
}
———————————————————————————————————
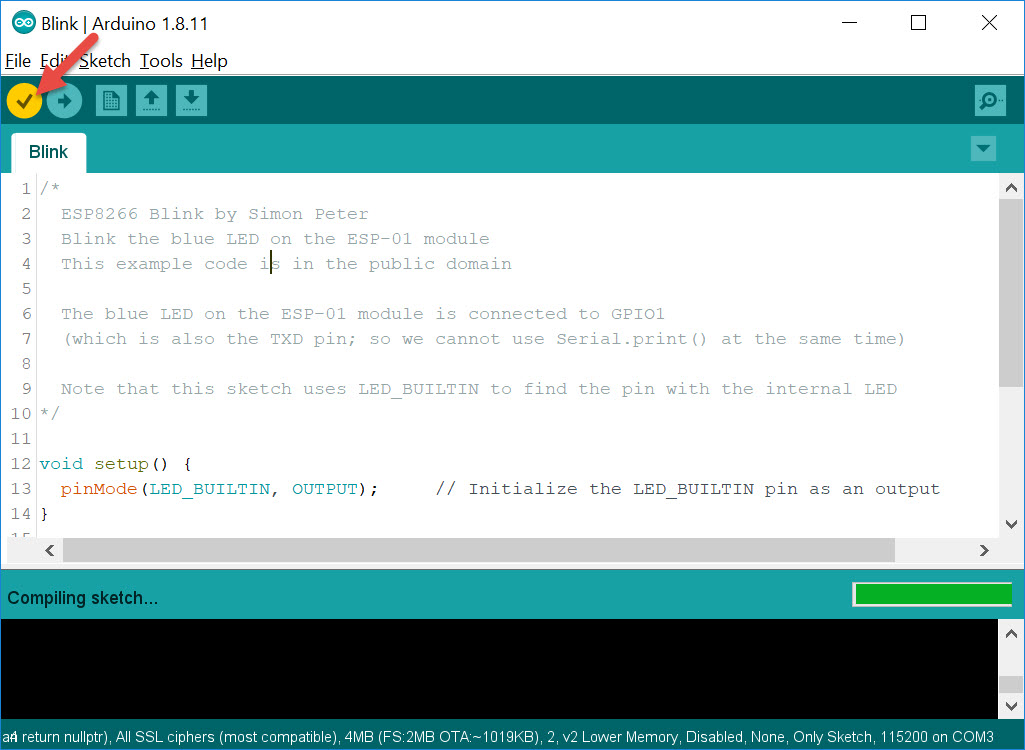
3. คลิกที่ / เพื่อทำการคอมไพล์โค้ด
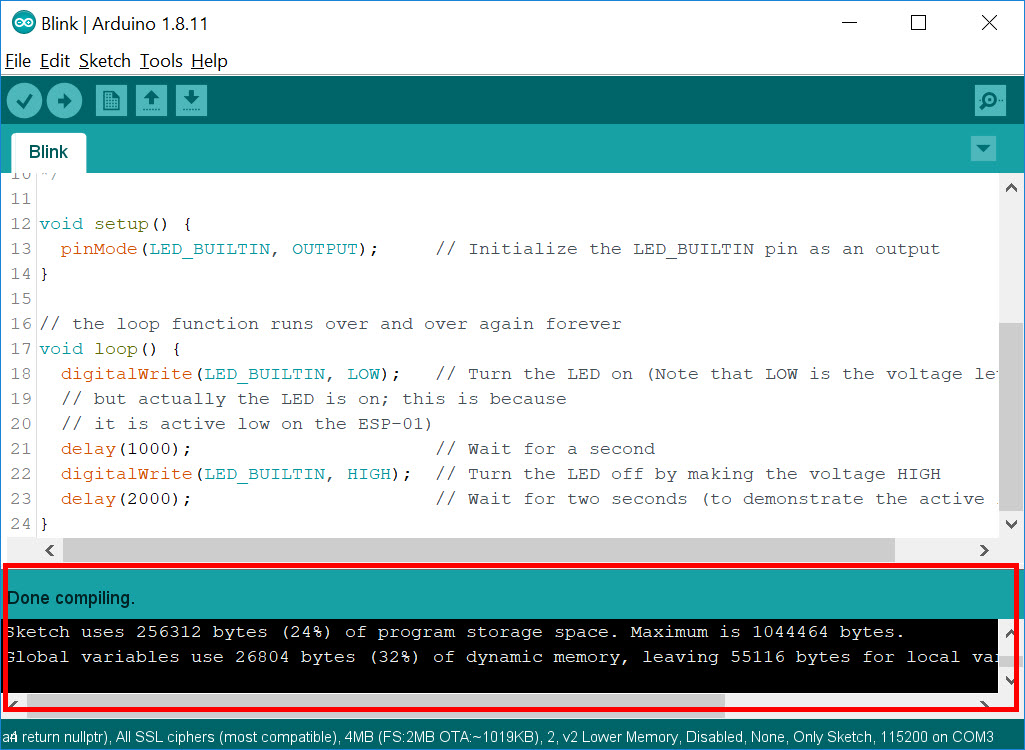
4. หากไม่มีข้อผิดพลาด จะปรากฎข้อความว่า “Done compiling”
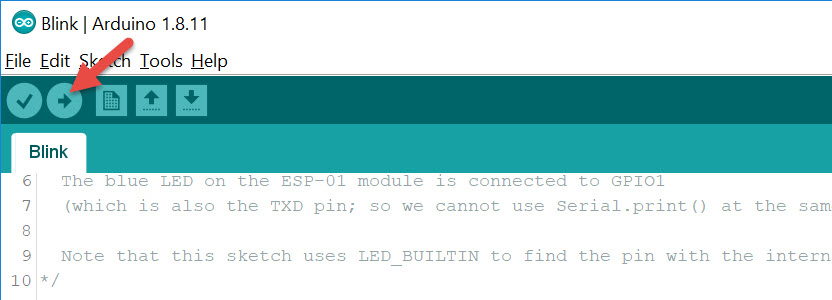
5. จากนั้นให้ทำการคลิกที่ปุ่ม -> เพื่อทำการอัปโหลดโค้ดเข้าสู่บอร์ด NodeMCU ESP8266
6. หากไม่มีข้อผิดพลาดจะขึ้นคำว่า “Done uploading” อัปโหลดสำเร็จ จะถึง …..100%
7. สังเกตุที่ตัว NodeMCU ESP8266 จะมีไฟกระพริบ
