การทำหลังติดตั้ง CentOS Linux 7
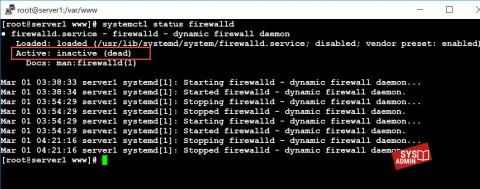
1. ปิด Firewall
# systemctl stop firewalld
# systemctl disable firewalld
# systemctl status firewalld
2. ปิดการใช้งาน SELinux โดยเปลี่ยนจาก enforcing เป็น disabled
# This file controls the state of SELinux on the system.
# SELINUX= can take one of these three values:
# enforcing – SELinux security policy is enforced.
# permissive – SELinux prints warnings instead of enforcing.
# disabled – No SELinux policy is loaded.
SELINUX=disabled
# SELINUXTYPE= can take one of three values:
# targeted – Targeted processes are protected,
# minimum – Modification of targeted policy. Only selected processes are protected.
# mls – Multi Level Security protection.
SELINUXTYPE=targeted
3. ตรวจสอบการเชื่อมต่ออินเทอร์เน็ต
# ip a
หากไม่ได้รับ IP ให้ทำการรีสต๊าท network ใหม่
# systemctl restart network
# ip a
หรือสามารถสั่งการผ่านทางหน้าต่าง Network Manager TUI
# nmtui

4. ตรวจสอบหมายเลข Gateway ของอินเทอร์เน้ตที่ใช้งานอยู่
# ip r
default via 192.168.1.1 dev enp0s3 proto dhcp metric 106
192.168.1.0/24 dev enp0s3 proto kernel scope link src 192.168.1.40 metric 106

5. ทดสอบ ping ไปยัง Gateway และอินเทอร์เน็ต
– ทดสอบเชื่อมไปยัง Gateway (Router)
# ping 192.168.1.1
– ทดสอบเชื่อมไปยังเครือข่ายอินเทอร์เน็ตเว็บ www.google.co.th
# ping www.google.co.th
Basic Package
5. ทำการติดตั้งแพ็กเกจพื้นฐาน
yum install unzip -y
yum install wget -y
yum install lynx -y
– ตรวจสอบการติดตั้ง
yum search unzip
หรือ
rpm -q unzip